
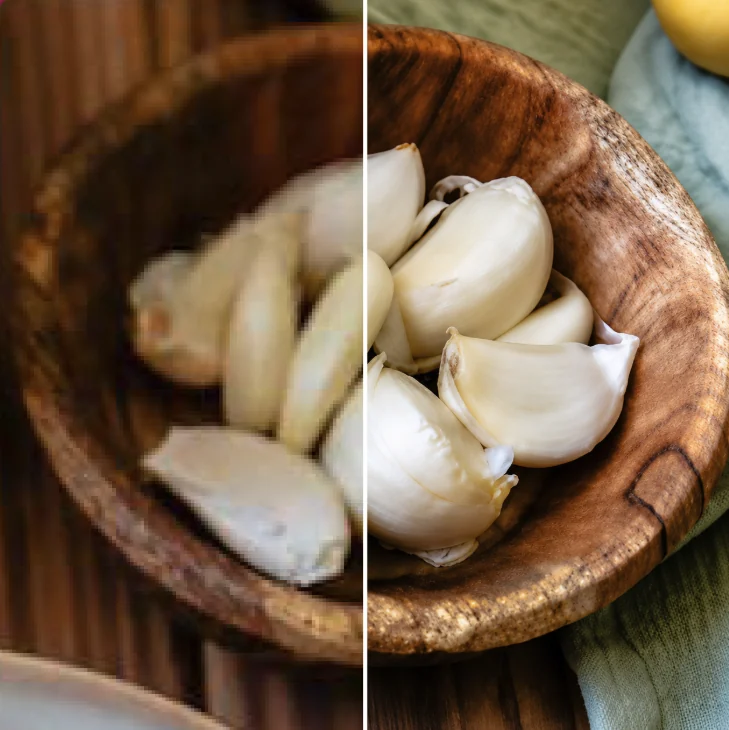
Example of the kind of before-and-after comparison I inspect when testing an image for print.
A photo can look perfectly fine on your screen and still be too low-resolution to print well. That becomes obvious fast when the same image needs to be enlarged for a poster, banner, sign, trade show display, wall graphic, or other large-format project.
When I am working with a customer-supplied raster image that is too small for the intended print size, one free tool I will test is Upscayl.
Upscaling is not magic and it is not a substitute for good original artwork. It is simply one production tool that can sometimes make a usable image better.
What is Upscayl?
Upscayl is an AI image upscaling application. Instead of only stretching the existing pixels, an AI upscaler analyzes the image and creates a larger version while attempting to reconstruct useful visual detail. I use it as a test when the original photo is smaller than I would like for the requested print size.
The desktop application is available from upscayl.org. This is not a sponsored recommendation. It is simply a tool I use and think is useful for customers, designers, and marketing teams.
When I consider upscaling an image
Posters and presentation graphics
A photo that looks fine on a laptop may become visibly soft when it fills a large poster or presentation board.
Banners, signs, and displays
Large-format graphics often use images at sizes far beyond how the source file was originally intended to be viewed.
Older web or customer files
A small JPG from a website, email, or old archive may be the only version available.
Historical or event photography
Sometimes the image cannot be reshot, so the goal becomes getting the best reasonable result from the source that exists.
The number I care about is effective PPI
Changing a file's DPI label by itself does not create additional image information. What matters for a raster image is how many pixels the file contains and how large those pixels are being spread when the image is printed.
A 1,200 pixel wide image placed at 12 inches wide has an effective resolution of about 100 pixels per inch. If a successful 4x upscale produces a 4,800 pixel wide file and it is still placed at 12 inches wide, the resulting file contains considerably more pixel information for the layout.
That does not mean the new file suddenly contains the same genuine detail as a photograph originally captured at the larger dimensions. AI is estimating detail. That distinction matters.
Why viewing distance matters
A brochure held in someone's hands and a banner viewed from across a room are not evaluated the same way. Small commercial print pieces usually need more image detail because people look at them closely. Large-format graphics can often work successfully at lower effective resolution because the normal viewing distance is much farther away.
That is why I do not make a print-quality decision from a DPI number alone. I want to know the pixel dimensions, the final print size, the type of product, and how the finished piece will normally be viewed.
How I use Upscayl in a print workflow
- Start with the best original file. I would rather receive the original JPG, PNG, TIFF, or photo export than a screenshot or an image copied from an email.
- Determine the real finished size. I check how large the image will actually appear in the final layout.
- Calculate the effective resolution. This tells me whether there is really a resolution problem and how large the gap is.
- Test a sensible upscale. A 2x or 4x result may be enough. There is no production benefit to making the file unnecessarily enormous.
- Inspect the enhanced image. I look closely at faces, hair, product edges, straight lines, texture, small objects, and anything the AI may have interpreted incorrectly.
- Place it back at the intended print size. The useful question is not whether the file looks impressive at 800 percent zoom. The useful question is whether it holds up in the actual print application.
AI upscaling cannot restore information that never existed
If a face contains only a handful of pixels, the software has to estimate what the missing detail should look like. Sometimes the estimate looks excellent. Sometimes it introduces artificial texture or features. The better the starting image, the better the odds of getting a useful result.
Do not use image upscaling as the first fix for a bad logo
A tiny JPG logo may look smoother after AI upscaling, but it is still raster artwork. For logos, lettering, icons, and simple graphics, I usually want the original vector file or a clean vector recreation.
Common vector formats include AI, EPS, SVG, and properly built vector PDFs. Vector artwork can be scaled for a business card, wall graphic, sign, vehicle graphic, or other large application without the same pixel-resolution limitation.
What I inspect before using an enhanced image
- Faces and skin texture
- Hair and fine edges
- Product edges and small objects
- Straight architectural lines
- Compression artifacts
- Artificial detail added by the model
My recommendation
If you have a low-resolution photograph that needs to be printed larger, do not assume it is unusable before checking the actual pixel dimensions and intended print size. Start with the best original file, determine the effective PPI, test upscaling only if it is needed, and inspect the result before production.
Sometimes upscaling saves the image. Sometimes the better answer is finding the original photo. Sometimes there simply is not enough useful information in the source file for the quality the project requires.
Need help checking an image for print?
Send the original image and the final size you want to print it. Those two pieces of information give me a much better starting point than a DPI number by itself.
Brandon Greene publishes Austin Signs and Print and works on commercial print, signage, awards, direct mail, event production, and file planning through AlphaGraphics.